
When it comes to weight training, there’s a simple but underrated truth everyone should know: your pull muscles are more important than your pushing muscles—even if by just a bit.
The muscles responsible for pull exercises comprise your posterior chain. These are the muscles you can’t see when you look in the mirror. Their strength and development, however, will have the greatest reach toward an impressive physique, healthy joints, and even stronger performance in other movements that are push oriented.
What Are Pull Muscles?
What do we mean by posterior chain, exactly? Here’s a list of its key muscles:
- Hamstrings
- Glutes
- Lumbar muscularture
- Lats
- Rear deltoids
- Rhomboids
- Traps
It’s imperative each of these muscle groups can pull their own weight in order to prevent imbalances and promote overall strength and healthy function. Strong glutes and hams are the cornerstone of athletic power and pain-free hinging. A nice, wide, and thick upper back also presents better when it comes to standing posture, overall width, and imposing size.
Related: This Push Day Workout Will Bring Size and Strength Gains in 6 Weeks
What Is a Pull Day Workout?
Many athletes schedule their weekly strength training around a push-pull-legs split. That’s three strength sessions, each dedicated to a specific set of muscles, spread over seven days. Breaking training programs into push, pull, and leg days is ideal if you’re seeking more muscle mass because it allows you to direct more volume and working sets to fewer groups of muscles that all serve a similar function.
Pull exercises differ from push exercises simply due to the nature of the motion. It’s as plain as, if you’re moving the weight toward you, it’s a pull pattern. If you’re moving the weight away from you, it’s a push pattern.
Related: 50 Best Shoulder Exercises To Target Full Range of Motion
The Best Pull Day Workout
What makes this program so damn effective? Put simply, it starts big, so you have the neural drive for the exercises that provide the most bang for your buck. As you get a bit more fatigued (which means it’s working), the workout shifts toward isolated movements that require less horsepower but more precision to complete. These lifts focus on the little things to sculpt your posterior chain. It’s the perfect storm. Perform this weekly pull-day workout for six weeks to see gains in size, strength, and power.
1. Barbell Deadlift
James Michelfelder
Muscles Worked: glutes, hamstrings, quads, core
How to Do It
- Step up to the loaded barbell, and get close, to ensure the bar is above the shoelaces. Keep the feet hip width apart.
- Without bending at the knees, reach down and place the hands on the bar, just outside the shins. Your back should be fully rounded.
- Next, dig in. Wedge your body into a tight position by dropping your hips down and raising your chest up as high as possible. This tension you place on the bar should help get your spine flat. It helps to think about turning your elbows to face behind you and squeezing your armpits down.
- Keep a full stomach of air, and stand up with the barbell. Squeeze the glutes and get tall.
- Lower the weight, keeping it close to your body. Push the hips back first, and think about sitting once the bar has crossed the knees on the way down.
- Perform 5 sets of 4 to 6 reps.
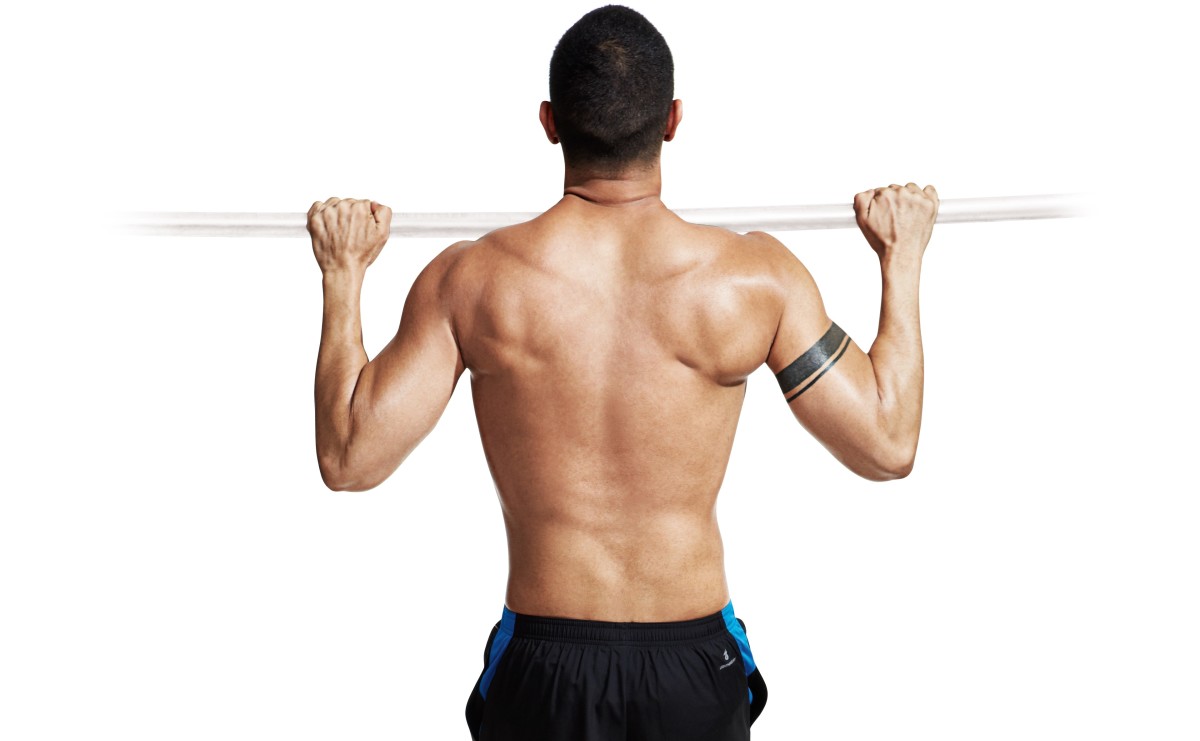
2. Pullups
Beth Bischoff
Muscles worked: lats, biceps, infraspinatus
How to Do It
- Using an overhand grip just outside shoulder width, hang from the pullup bar. Keep the thumbs wrapped around the bar; don’t use a false grip with the thumb on the same side as the fingers.
- Keep the body tight and still. Avoid any swinging. The arms should be fully extended. This is your start position.
- Set the shoulders by raising the chest and lengthening the neck first. You should feel your upper back pull your shoulder blades down toward your back pockets when you do this correctly. This is how to initiate each pull and engage your back more than your arms.
- Pull through your elbows until your chin clears the bar. Lower slowly and repeat.
- Perform 4 sets of 8 to 10 reps (or max reps, if fewer).
3A. Bentover Row
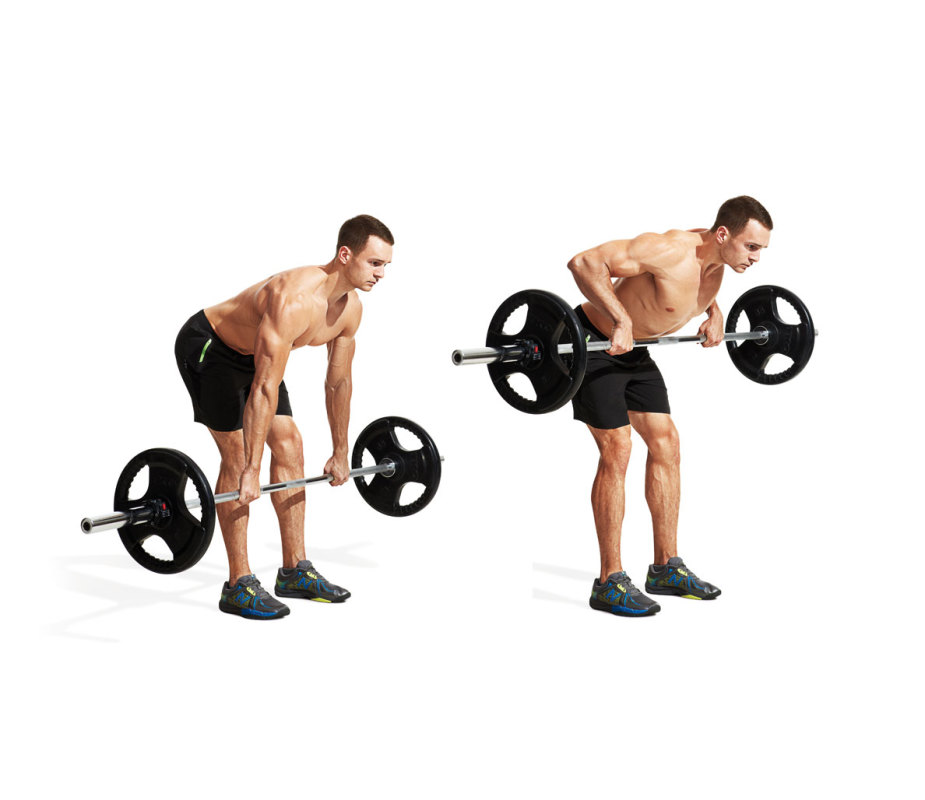
Muscles Worked: lats, rhomboids, spinal erectors, trapezius
How to Do It
- Stand upright, and hold a barbell with your bench press grip. Hinge forward so the weight is hanging at just below knee level. Keep a flat spine.
- Create tension in your upper back by drawing the shoulder blades together, and row the weight up by pulling through the arms. Aim to make the weight contact the ribcage. Keep the elbows wide.
- Perform 10 reps and move on to 3B without resting to form a superset. Do 3 total supersets.
3B. Cable Reverse Flye
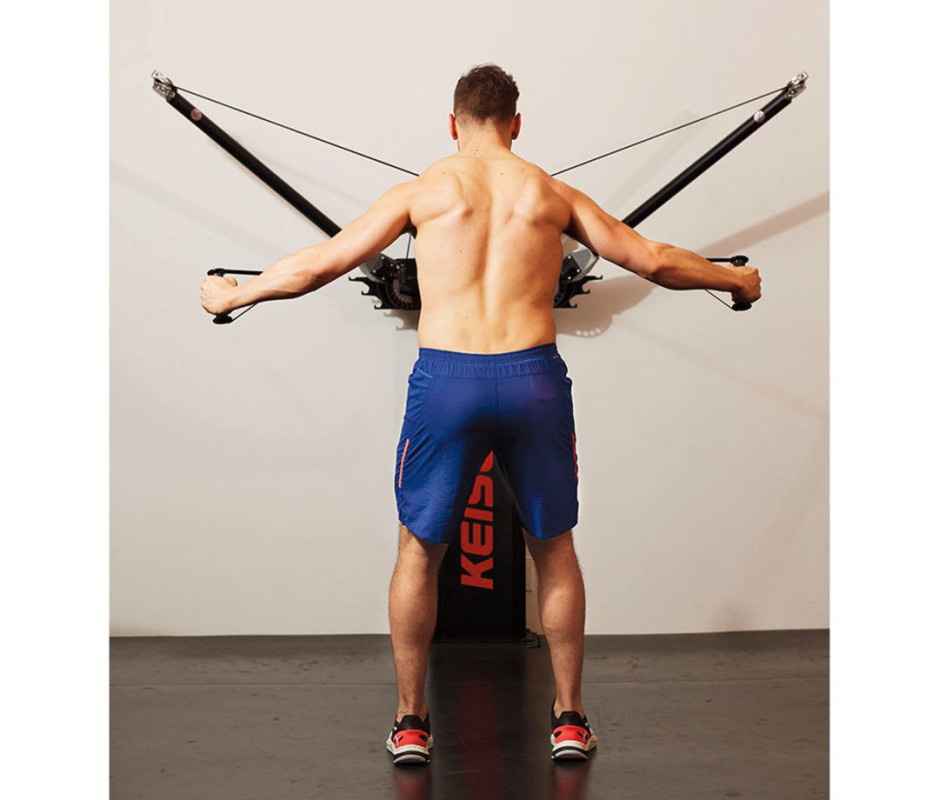
Muscles Worked: rear delts, rhomboids, trapezius, lats
How to Do It
- Set up two cable pulleys at forehead level and stand between them. It’s best if they have no handle attachment. Load them light.
- Stand tall, and hold the left pulley with the right hand, and the right pulley with the left hand. Keep the arms long, and abduct the arms for a flye pattern.
- Squeeze the shoulder blades together on each rep to encourage upper back activity.
- Perform 12 reps, supersetting with 3A’s bentover row 3 times.
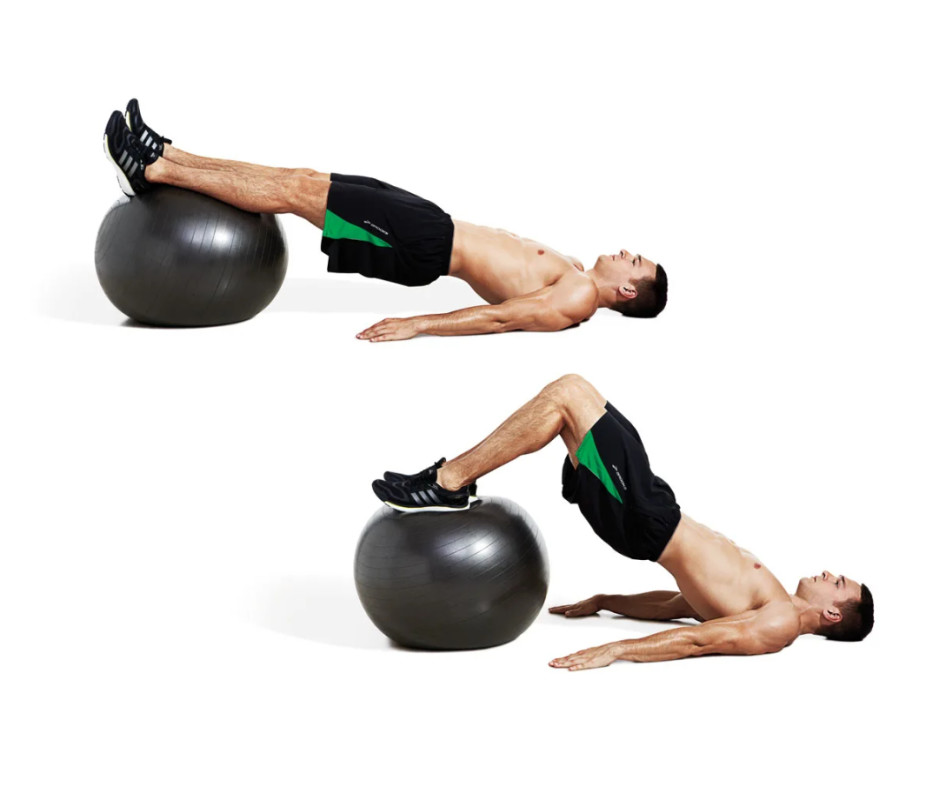
4. Swiss Ball Hamstring Curl
Beth Bishoff
Muscles worked: hamstrings, glutes, abs, lumbar
How to Do It
- Lay on your back with a Swiss ball positioned under the feet (start with straight legs).
- Elevate the hips and remain stable. Brace your core so the ball doesn’t roll you to the left or right. Pressing the arms into the floor can also help.
- Keeping the hips high, roll the ball in toward your glutes, using your heels. When you’ve gotten the ball in as close as possible, return to full extension slowly. The eccentric rep matters more than the concentric here, so be mindful of keeping it under control.
- Perform 4 sets of 12 reps.
5. 45-Degree Back Extension
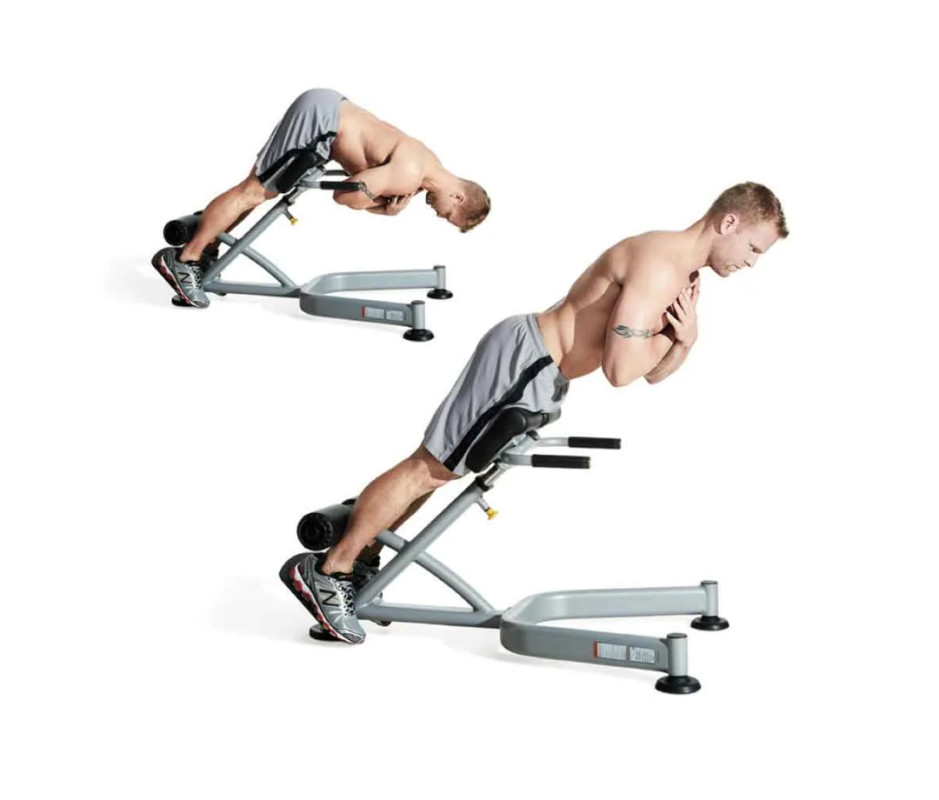
Muscles worked: glutes, hamstrings, spinal erectors
How to Do It
- Set the back extension machine to a position where the pad is located just below hip level. This will allow unrestricted freedom of rotation around that joint.
- Position yourself in the machine, and be sure the thighs are pressing firmly against the pad on the front, while the calves and ankles are pressing firmly against their support behind.
- Maintain a flat spine and pivot downward as far as your spine will allow. You should feel a good stretch in the hamstrings.
- Squeeze the glutes first in order to initiate the movement up to the top position. If you want to involve your glutes more than your lower back, then keep the ribs tucked downward (shoulders will round a bit to do this). If you want more lower back involvement, then allow the ribs to flare upward. Lower slowly and repeat.
- Perform 3 sets of 12 reps.